|
My aging Razer Blackwidow keyboard recently began exhibiting a fault in which it would randomly disconnect. I even plugged a different keyboard into the computer because it seemed as if the fault was permanent but then I noticed that the keyboard was responding again.
I eventually figured out that the fault was located in the cable right at the strain relief boot. I briefly thought of buying a new keyboard but immediately came to my senses. Opening the keyboard, I nearly destroyed the cable connector trying to unplug it from the PCB. In fact the green contact came free of the housing and it was a tricky job getting it reinserted.
I cut the cable and then had to deal with the braiding. That was fiddly but I managed to clear a length of the braid to get to the plastic sheath. I stripped that and once through the shielding wires I had access to the data wires. It was fairly easy to strip them to reveal the conductors in preparation for joining but I noticed an odd thing. On the keyboard side of the cut, the conductor wires had plastic fibres coaxial with the copper. That's pretty common in cables that are expected to flex a lot - you see them in headphone cables and suchlike. But the plastic fibres seemed absent on the far end of the cable. When I was tinning the conductors on the keyboard end I had to burn off the plastic fibres, but on the other side that wasn't needed. Not sure what was happening there.
By this time I had already investigated the strain relief boot. I was sure that I'd have to bodge up some solution but to my surprise the cable came out easily enough, even the braid, so I was able to refit the boot to the cable. The only issue was that I couldn't get the braid through the strain relief boot, which meant that the cable wasn't really super well secured. I protected against the cable being yanked out with a couple of cable ties on the inside and added a cable tie on the outside to stop the braid from fraying and also to make sure it looks as janky as it is.
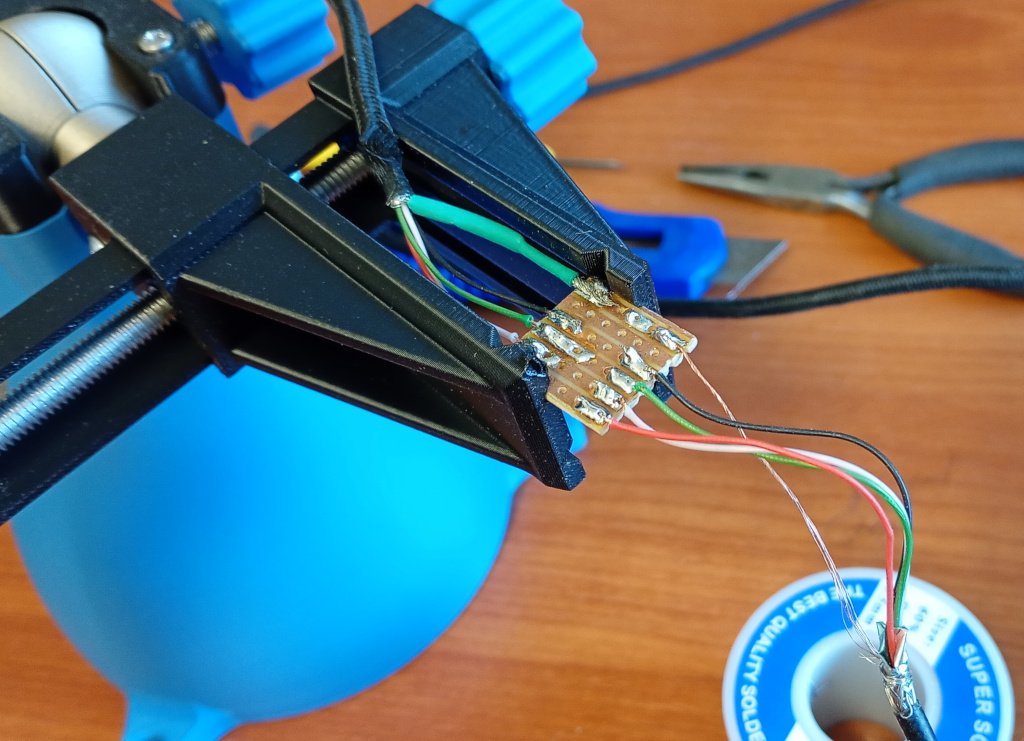
So I'd cut the cable and tinned the connectors. I was not confident of being able to join the conductors very well because they were so thin, and my eyesight, so I scrounged around for a piece of prototyping board to use as a connection medium. The conductors went on okay but I had trouble with the shielding wires; I wanted to preserve the electrical connection, even if the join itself wasn't actually RF shielded or whatever. I had the devil of a time trying to get solder to stick onto the shielding wires. I managed to make it stick but probably shouldn't have.
You see, included in the shielding braid was a bundle of copper coloured strands and that struck me as odd at the time. It was only as I was struggling to get solder to stick to the shielding wires of the cable end of the join that I twigged that I was trying to solder onto stainless steel and not nickel plating. Well, I guess it is stainless, otherwise why include a bundle of copper strands? So for the cable side of the join I cut off all the stainless steel strands, bundled up the copper strands and soldered them to the proto board.
After checking the spacing between the case the the keyboard PCB, I positioned the prototyping board with the attached cables with a bit of double sided tape, retained the cable with some kapton tape and then plugged in the joined cable. I noticed that the terminal on the green wire appeared proud, as if it wasn't fully seated. so I gave it an extra little push with a screwdriver. It was then time to do a continuity test. I was worried about the green wire because I wasn't sure whether I'd badly damaged the connector but they all checked out okay. I resoldered the ground connection to the PCB and that was done.
I plugged in the keyboard and booted the computer to see if everything was working and it was. A couple of minutes of screwdriver work later and the keyboard was reassembled and typing was back on the menu.
Thoughts
I struggle soldering teeny tiny wires; I'm never confident about my work, hence using the bit of PCB to help with the joining. I'm a bit annoyed that I didn't recognise why the shielding braid wasn't accepting solder until I had already finished the first joint but it is what it is. For me, jobs like this are always 50/50 on whether they'll work out simply because of how fiddly they are, dealing with JST connectors and suchlike. But hey! Here I am typing on the keyboard and maybe it won't immediately fritz out again.
|