So I added a rail. Mum wanted a rail.
I figured I’d need to make up some posts with flat bases that could be bolted to the floor, with some kind of handrail attached.
I’d already had a mosey around the metal section at Bunnings and a poke through the shelves at home. Once the decision was made I bought 3 lengths of 40×40 galvanised square steel and selected some 3mm plate metal that was left over after demolishing the lift. I cut a couple of rectangles of plate steel and drilled them for the mounting bolts.
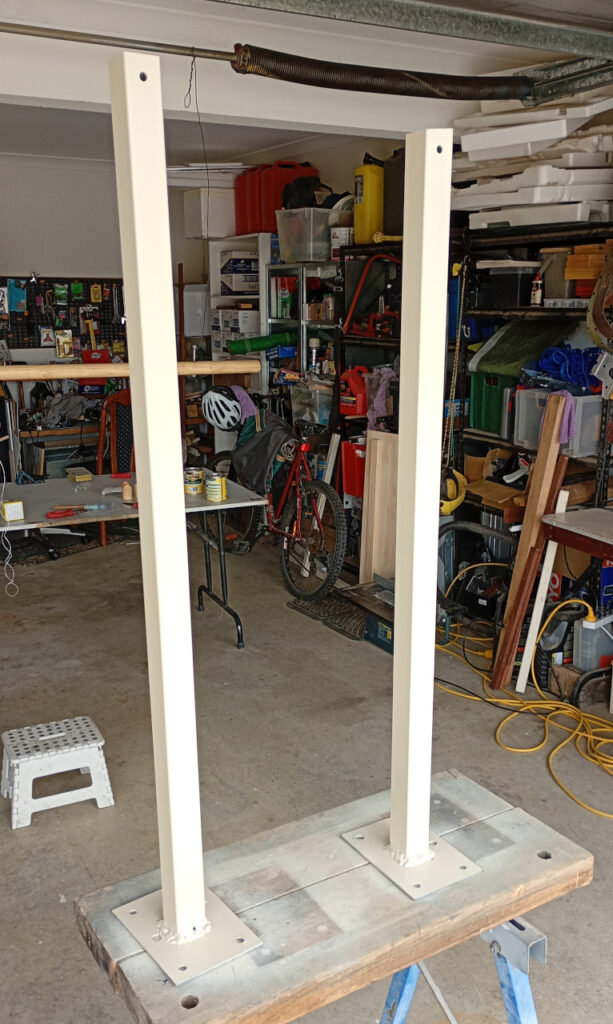
After preparing the posts and the plates, I had a go at welding them together. Well, that was a complete disaster. I’m not saying the job isn’t done, but any 8th grader could do a better job. I don’t want to blame anything other than me so I’ll just say I need more practice. Much more practice. Regardless, I drilled and tapped holes in the top of the posts for the handrail and spray painted the finished(?) posts.
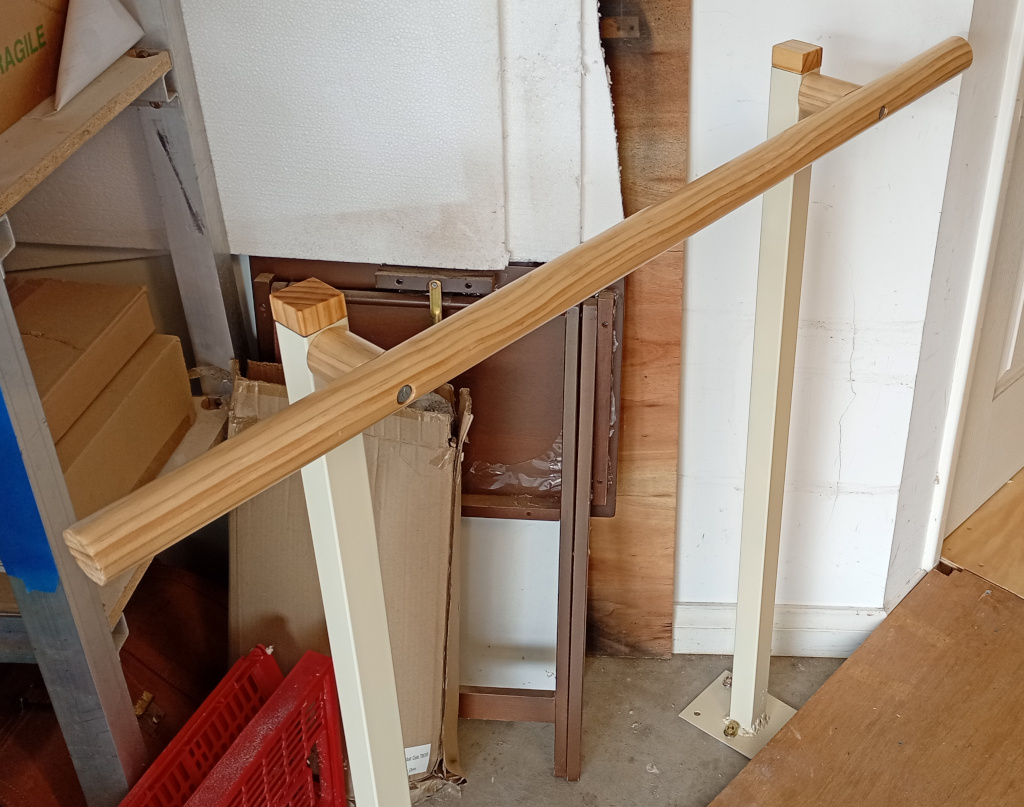
Fitting the posts to the garage floor was a little tricky. I already had a collection of dynabolts that I’d borrowed from my aunt, so that was sorted, or so I thought. I marked the location of the holes in the concrete and drilled them out, but the bolts I had were too small and kept pulling out. So I returned to Bunnings and bought some larger bolts. By this stage I’d had a go at making a handrail from pieces of merbau that Chris gave me, but I wasn’t happy with that solution. Looking in the timber section I thought I’d go with 40×40 square pine, but then I caught sight of the 42mm eco friendly timber dowel and knew that’s what I needed.
Back home, I managed to get the dynabolts in place and fitted the posts, though a fair bit of filing was needed because, yeah.
I cut off a length of the dowel and fitted it into a holding jig then used a ?? size forstner bit to drill it in half. I ended up with 2 pieces of dowel with a half round recess on one end. The drill wasn’t quite the right size, but close enough that the two drilled pieces mate well enough with the rest of the rail. I drilled the two pieces down the middle and drilled mounting holes in the rail, taking great pains to get the drill through the middle of the timber. Although I created a couple of pockets for the bolt heads in the rail, they were too small to admit a tool for tightening. That meant I needed to use nuts on the inside of the posts instead of the thread. So I drilled out my threads and carefully fitted the rail in place; carefully because if I dropped the nuts down into the posts I’d have had to unbolt them from the floor to retrieve them. The two short pieces I made act as standoffs for the hand rail.
And then I unscrewed it and gave it a first coat of varnish. After that dried I refitted the handrail to the posts. I gave it a sand down and another coat of varnish. The posts are open at the top but I’ve started designing a couple of plugs in Blender and we’ll see if I can print them. I only have blue PLA so they will have to be blue.
I say that but actually no. Instead I fashioned some plugs from pieces of pine. I’m not sure I’m convinced about the styling but they get the job done. Looking at it, I think it would have been best if the post ends had been capped with a piece of steel welded competently onto the end, ground down and the whole lot spray painted. As it is, the square wooden plugs clash stylistically with the roundness of the railing. Had the posts been round, or the railing square, that wouldn’t have been a problem but look at me critiquing my work like a damn interior decorator and pretending the abomination that is my welding doesn’t exist. The point is, I think I’ve finished.