After I finished the little computer monitor, I immediately thought wouldn’t it be great if it could actually have a display. That would mean designing a circuit board or something to go in behind the screen, but the front bezel was not really designed for that and it’d be pretty janky using the existing one. I redesigned the bezel to include some mounting pegs, but also turned the power switch decoration into a functional switch. That meant several iterations of design to find a way to incorporate a switch into the bezel, but that ended up working out quite nicely.
The next big challenge was choosing the design for the display. My vision was to create an animated display that gestured towards an olde timey text display, with text appearing on the screen in a variety of patterns. Now, I could go all out and build the circuit board and populate it with LEDs and so on and perhaps that’s what I’ll do, but I’m hesitant because my PCB manufacturing ability is bad, without a decent laser printer to do the transparencies on. Matt put me onto 144 leds/m neopixel strips and that’s also an option, though I wouldn’t be able to get the same density as I would using a standard LED array. In any case I haven’t got the LEDs or the links. Maybe something designed in KiCad and sent over for fabbing in China would be the best but even then, there’s the freight cost. In any case things will have to wait for a while because money.
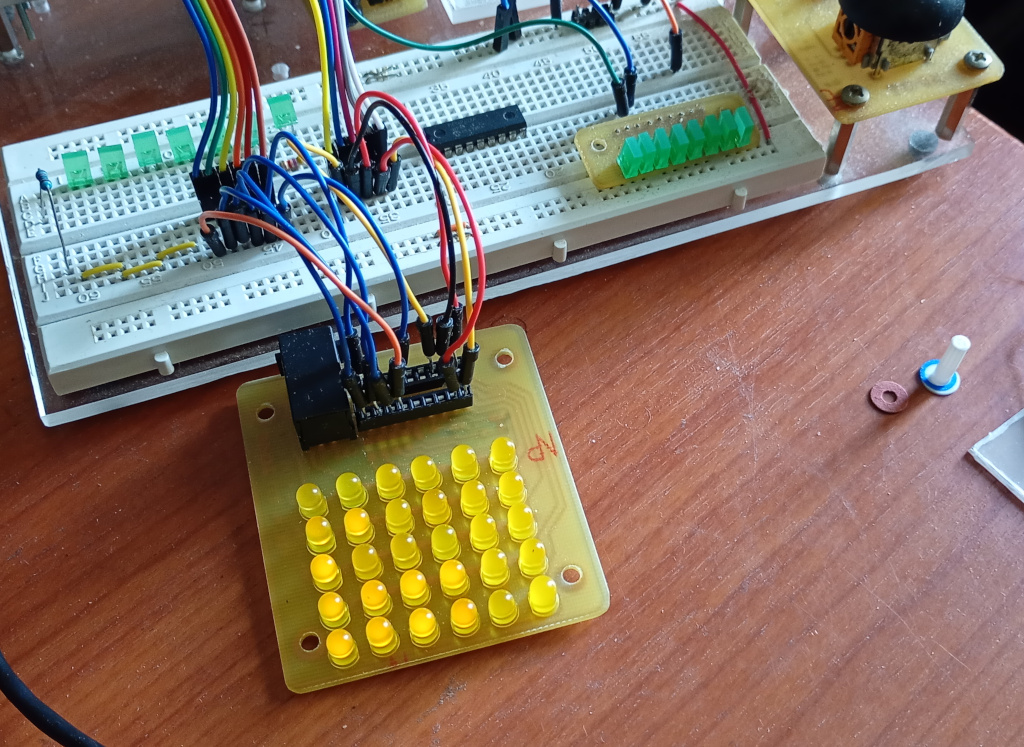
In the meanwhile I sat down to design the software. I took the PIC chip out of my existing LED array and plugged a pile of wires into it that I connected to the Raspberry Pi Pico that I have on my breadboard setup. The software is divided into 2 parts: the matrix driver and the pattern generator.
Each part runs in its own thread, so they can run concurrently. The matrix driver simply loops through each of the array rows and sets the state of each of the LEDs in that row from the values it gets from the screen memory. That’s all. The other thread is what populates the screen memory. The program randomly chooses one of the programmed effects and a random duration, then calls a method to display the effect for the chosen amount of time.
The effects are:
| Blinking Cursor | A single LED flashes at the given coordinates, usually 0,0. |
| Typing | The screen is filled up from the top by lines of LEDs of randomised length, with a randomised delay between each LED, simulating a person typing on the computer. When the typing reaches the bottom of the screen, the text scrolls up and the typing continues until the time is up. |
| Text | The screen is filled with random text at high speed, like when the computer is executing a script. |
| Screen by Screen | The screen is filled with random text, one screen at a time, like the user is scrolling through a help document. |
| Screen Saver | A single LED bounces around the screen like the DVD screen savers. |
| Random Fill | The screen randomly fills then pauses before refreshing, repeating a few times. |
So far the program works pretty well, but this is with an array of 6 x 5. I don’t know how it will fare with a 16 x 7 array or whether it will even work using neopixels. I’m guessing the 16 x 7 array will do fine. The only real problem so far is that it occasionally crashes. Some commenters have suggested it could be caused by issues with the multithreading. Others have said memory issues could be at fault. One of the problems I had was that the program would continue to function but stay stuck on the same pattern forever. I think I’ve fixed this by switching from using ticks_us() to using ticks_ms() to time how long a pattern has been running for, as well as using ticks_diff() to do the duration comparison to avoid wraparound issues. Now the crashes I see are where the display completely freezes without error and that looks like a threading problem or memory issue. Maybe I need to read up on using the watchdog timer to automatically reset if the system becomes unresponsive.
An Early Problem I Had
When I first wrote the program, I tried setting up the screen memory list by using
pixels = [[False] * numCols] * numRows
This creates a list with numRows elements, each element being a list of numCols Booleans. But the display kept showing the same pattern on each row. After some time, I became suspicious that each row was actually the same object and checked the object IDs of each of the rows. Sure enough, the above code creates a list of numRows items, but each item is the same object, so whenever you change one of the elements in one of the rows, all of the rows are affected. So I sorted that out by using a for loop.
Anyway, the display looks pretty neat and I’d like to see it at full res and in green but I guess that will have to wait.