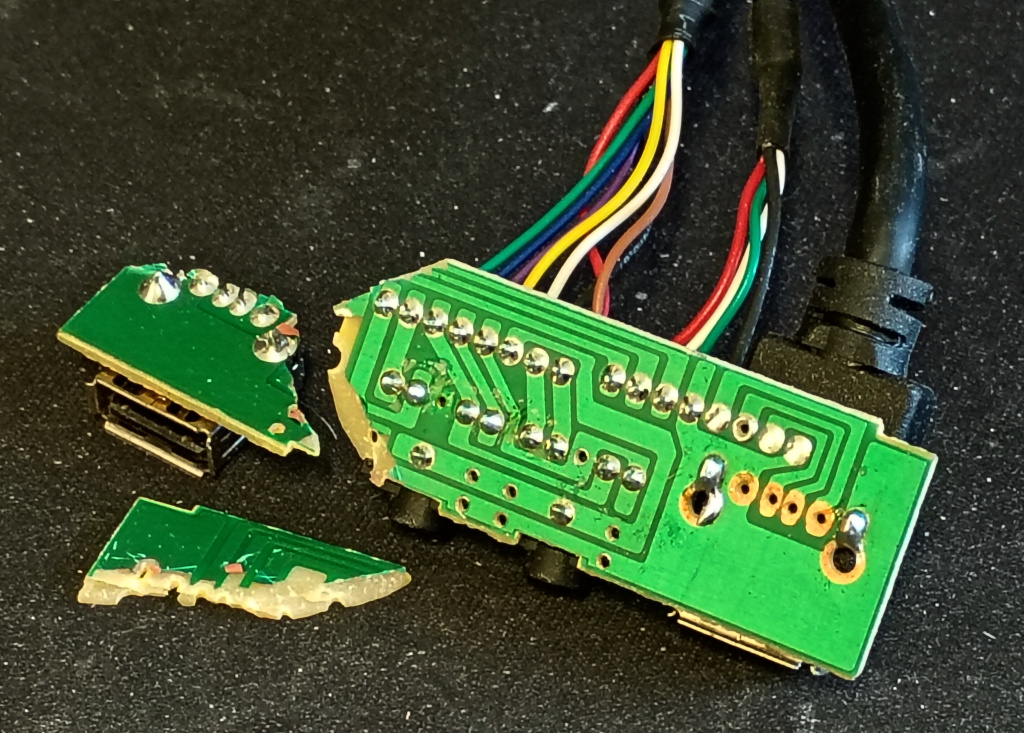
This was the state of my front IO connector PCB after I tripped over the USB cable, yeah not good. I figured I could make a replacement board, but before going that far I thought I’d try to repair the existing one.
The first step was to glue the fragments back together again. I cracked open a tube of super glue and did precisely that.
Now I needed to repair the traces. Well, I had a go at stripping off the green solder mask with a junk board. That was easy enough with the Dremel but maybe emery paper would have been gentler. Anyway, I had a crack at it and didn’t do a very good job.
Examining the traces more closely it was clear they were in poor shape and trying to bridge the gaps wasn’t going to be easy, so I decided to give that away.
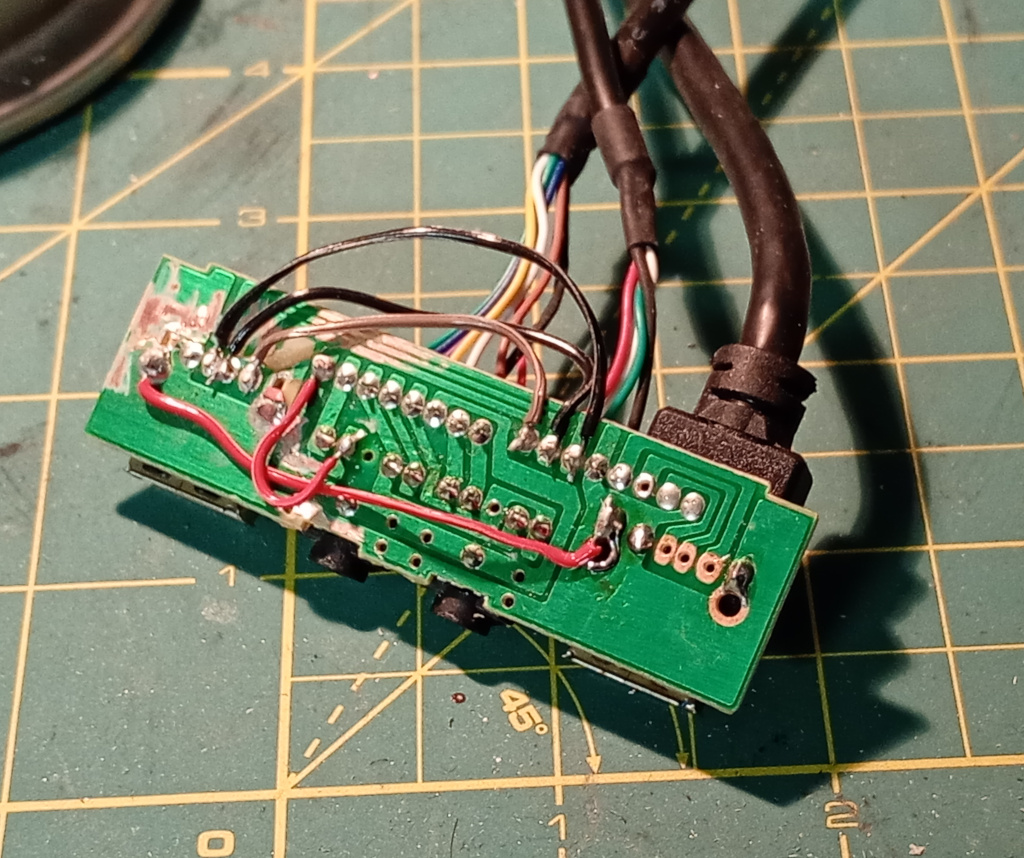
Instead I decided to bridge the joints directly. Here you can see the wires leading from the USB cable to the USB connector, on the left of the image. Sorry I’m sitting here trying to figure out the difference between left and right.
There was also a broken audio track that needed patching.
Once the soldering was done and the continuity checked I mixed up some epoxy and slopped it all over the component side of the board. I figured that given it was a board with connectors and likely to be stressed in normal use it made sense to make sure the fractures were thoroughly reinforced.
While I was waiting for the epoxy to set, I had other jobs to do.
I used the hot glue gun to glue the power and hdd LEDs back into the front panel. I also discovered why the power switch didn’t want to sit straight. Apparently there is a right way and a wrong way for the button to be oriented in order to match the slight bevel of the top of the case. I thought it was sitting wrong but no, it needed to be rotated 180°.
Recently I broke the front feet off the computer. It turns out that the plastic they were made from was super brittle. I had had the computer sitting wedged up on a piece of foam, so this was the ideal time to find a better solution. I collected a set of feet I had harvested many years ago and tried to fit them. At first it looked like they were not going to fit — the holes were too small, but I discovered that I could shove them in anyway and not worry about the centre pins. So that was done.
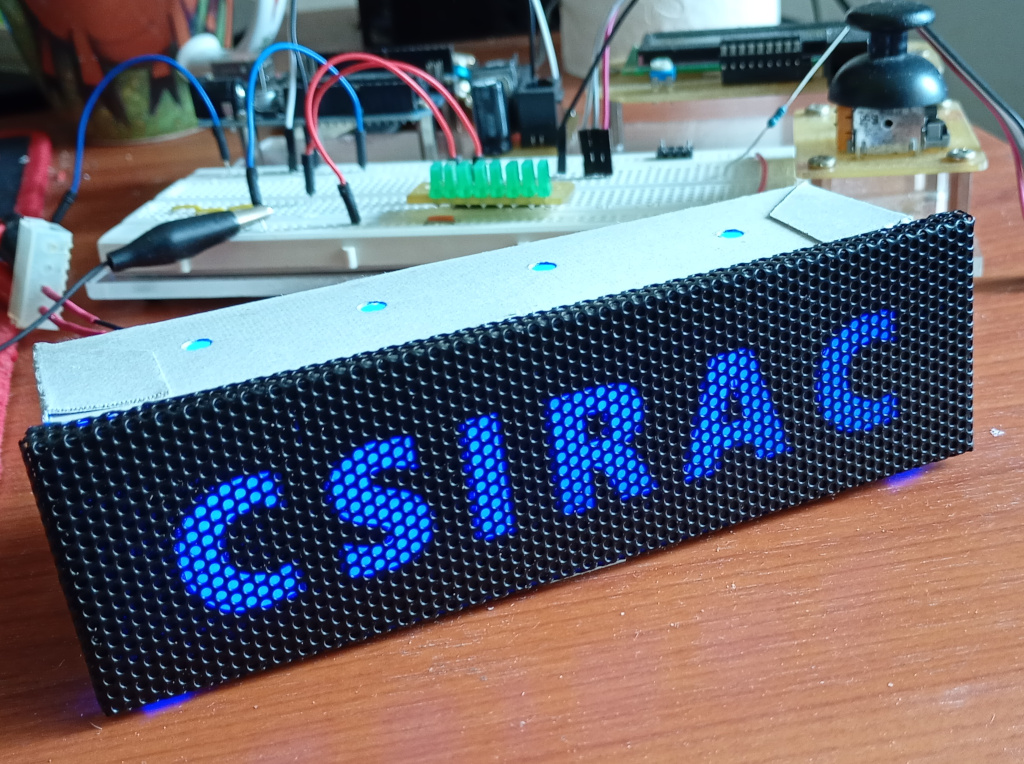
I also decided to update the illuminated nameplate. It was lit with four random white LEDs and wasn’t shrouded at all, meaning the display was quite dim.
I took off the old LEDs that were attached with a 3D printed bracket and made a shroud from white cardboard. I took a length of 4 RGB strip LEDs and stuck them inside. The hole for the cable ended up looking like a dog’s breakfast because I didn’t make it wide enough to accommodate the 2 wires when the LED strip was stuck in place. While I was soldering, I swapped the connections of the Molex plug so the module now draws from the 5v line.
I punched some holes in the top for ventilation and screwed the shroud onto the face plate. Everything fit like someone had measured with a ruler or something.
Now that the face plate is installed, I can confirm that the display is much more visible.
Then it was a case of putting everything together again, doing a mediocre job of cable management and powering on. Yeah, it still works.